"I fear that so many feel that a long-term supply is so far beyond their reach that they make no effort at all. Begin in a small way…gradually build toward a reasonable objective.” -President Gordon B. Hinckley,
Showing posts with label Emergency preparedness. Show all posts

Monday, June 29, 2015

Family Disaster Plan


It's a sunny Tuesday afternoon, your children are in school, your spouse is at work, so you take the opportunity to run some errands. You've been to the post office to mail a letter to a dear friend, stopped by the dry cleaner, and have just placed the last item on your grocery list into your shopping cart, when you feel the ground beneath you move. A 7.2 magnitude earthquake has just struck. You somehow manage to make it safely out of the grocery store and realize with terror that your cell phone has no service and the roads are so damaged you can't possibly drive home. 

How will you communicate with your family to find out if they are okay? How will they know that you are okay? And how will you reunite with them? 

It is important to make sure that the entire family is prepared and informed in the event of a disaster or emergency. You may not always be together when these events take place and should have plans for making sure you are able to contact and find one another.

Basic steps to make sure you remain safe:


  • Meet with your family or household members.
  • Discuss how to prepare and respond to emergencies that are most likely to happen where you live, learn, work and play.
  • Identify responsibilities for each member of your household and plan to work together as a team.
  • If a family member is in the military, plan how you would respond if they were deployed.

    Plan what to do in case you are separated during an emergency

  • Choose two places to meet:
  • ̶ Right outside your home in case of a sudden emergency, such as a fire.
    ̶ Outside your neighborhood, in case you cannot return home or are asked to evacuate
  • Choose an out-of-area emergency contact person. It may be easier to text or call long distance if local phone lines are overloaded or out of service. Everyone should have emergency contact information in writing or saved on their cell phones.
  • Go here to download a template for your family plan.

    Plan what to do if you have to evacuate

  • Decide where you would go and what route you would take to get there. You may choose to go to a hotel/motel, stay with friends or relatives in a safe location or go to an evacuation shelter if necessary.
  • Practice evacuating your home twice a year. Drive your planned evacuation route and plot alternate routes on your map in case roads are impassable.
  • Plan ahead for your pets. Keep a phone list of pet-friendly hotels/motels and animal shelters that are along your evacuation routes.

Let Your Family Know You're Safe
If your community has experienced a disaster, register on the American Red Cross Safe and Well website to let your family and friends know you are safe. You may also call 1-800-RED CROSS (1-800-733-2767) and select the prompt for "Disaster" to register yourself and your family.

Monday, June 1, 2015

First-aid kits


A well-stocked first-aid kit can help you respond effectively to common injuries and emergencies. Keep at least one first-aid kit in your home and one in your car. Store your kits someplace easy to get to and out of the reach of young children. Make sure children old enough to understand the purpose of the kits know where they're stored.
You can buy first-aid kits at many drugstores or assemble your own. You may want to tailor your kit based on your activities and needs. A basic first-aid kit includes:

Basic supplies

  • Adhesive tape
  • Elastic wrap bandages
  • Bandage strips and "butterfly" bandages in assorted sizes
  • Nonstick sterile bandages and roller gauze in assorted sizes
  • Eye shield or pad
  • Triangular bandage
  • Aluminum finger split
  • Instant cold packs
  • Cotton balls and cotton-tipped swabs
  • Disposable nonlatex examination gloves, several pairs
  • Duct tape
  • Petroleum jelly or other lubricant
  • Plastic bags, assorted sizes
  • Safety pins in assorted sizes
  • Scissors and tweezers
  • Soap or hand sanitizer
  • Antibiotic ointment
  • Antiseptic solution and towelettes
  • Eyewash solution
  • Thermometer
  • Turkey baster or other bulb suction device for flushing wounds
  • Breathing barrier
  • Syringe, medicine cup or spoon
  • First-aid manual

Medications

  • Aloe vera gel
  • Calamine lotion
  • Anti-diarrhea medication
  • Laxative
  • Antacids
  • Antihistamine, such as diphenhydramine
  • Pain relievers, such as acetaminophen (Tylenol, others), ibuprofen (Advil, Motrin IB, others) and aspirin (never give aspirin to children)
  • Hydrocortisone cream
  • Cough and cold medications
  • Personal medications that don't need refrigeration
  • Auto-injector of epinephrine, if prescribed by your doctor
  • Essential oils such as these

Emergency items

  • Emergency phone numbers, including contact information for your family doctor and pediatrician, local emergency services, emergency road service providers, and the poison help line, which in the United States is 800-222-1222.
  • Medical consent forms for each family member
  • Medical history forms for each family member
  • Small, waterproof flashlight or headlamp and extra batteries
  • Waterproof matches
  • Small notepad and waterproof writing instrument
  • Emergency space blanket
  • Cell phone with solar charger
  • Sunscreen
  • Insect repellant
  • Whistle

Give your kit a checkup

Check your first-aid kits regularly to be sure the flashlight batteries work and to replace supplies that have expired or been used up.
Consider taking a first-aid course through the American Red Cross. Contact your local chapter for information on classes.
Prepare children for medical emergencies in age-appropriate ways. The American Red Cross offers a number of helpful resources, including classes designed to help children understand and use first-aid techniques.


Thursday, April 30, 2015

Cooking- When the Power Goes Out


Any type of crisis creates a significant amount of stress. If you have spent time developing a variety of alternative energy cooking skills, you will have one less thing to worry about. So the power is out ... sounds like a great excuse to Dutch oven or barbeque. 

Develop a series of cooking options that will ensure you will be able to cook in several emergency situations. Consider evacuation, indoor, outdoor, sheltered, flameless, cold weather, and hot weather as you plan. Carefully plan how you will safely store the fuels that you need. Fuel conservation is a high priority. Storing enough fuel safely to last for a year is absolutely possible, if you practice conservation.  
Be wise (translated that means, "don't do stupid things!"). Please be safe! What an incredible tragedy it would be to survive an initial disaster only to harm your loved ones through a tragic mistake in judgment. Store fuel legally and very carefully. Never burn anything indoors that is intended for outdoor use. Be very careful with any open flame. Err on the side of caution.

Here are a few ways to cook for meals when the power goes out: 
   1. Dutch Oven- One of my favorite ways to cook.Here are a few tips-
*Protect your dutch oven from wind and rain, or add extra coals to compensate.
*Remember, it’s not an exact science, be ready to add or take away coals as needed (usually add).
*Cooking meat? Move coals to the bottom.
*Baking bread or desserts? Move coals to the top
*Meals that require more than 30-45 minutes to cook may need new coals added during cooking. If so, light new coals soon enough to allow them to get going before you need the.
*Keep the lid closed! Avoid peaking more than needed.


2. Camp Stove-  Most people who enjoy camping have some sort of propane or butane camping stove that they use. Don’t be afraid to pull out the stove at home even if you aren't camping. Experiment with cooking some regular family meals on it as opposed to just usual camping food. Pay attention to fuel usage and make a plan for how much to store. You can learn a lot by simply practicing.

3. Rocket Stove-  These types of stoves use minimal fuel and can burn twigs, leaves, pinecones, etc.  HERE is one of the rocket stoves I have. You can also make your own in a pinch from a #10 can.  Instructions for a DIY rocket stove can be found HERE. 

4. Wonder Oven- Basically, you bring food up to temperature, pop it in a wonder oven, and it continues to cook without any fuel. You still have to have a way to bring food up to temp before putting it in, but these are easy to make at home. Think the off-grid slow cooker. Food cooks all day while you go play!  I love this one and love that they donate one to a family in need in Africa every time you buy one. DIY instructions HERE.

5. Sun Oven- If you can cook with the sun, it is going to be best bet for conserving your fuel. Solar power is renewable and unlimited, as long as it’s a sunny day! Cook any of your regular foods outdoors using the power of the sun. I really like this one, but if you don’t have one there are a couple of plans online to be able to make your own. This one is a little more like a real sun oven, and this one is a simple pizza box oven that will not get too hot but can be used sort of like a slow cooker.

6. Open Fire-  This is the way many a pioneer cooked on their trips west or on the frontier. And if all you have is a cast iron skillet, it will get the job done. 


When it comes to cooking without power, you have to have a fuel source. That fuel source may be in the form of the sun, propane, butane, Insta-fire, charcoal or a variety of other fuels.
I recommend working on building, and using food storage in cases where you have power, then gradually start learning about, and implementing powerless cooking tools.
There are a variety of make-you-own cooking tools out there. They are good for short term emergencies, or to practice and get your feet wet if you have a smaller budget. As you're able to allocate more of your budget to powerless cooking tools, I recommend getting more durable tools.
One thing to consider is that while there are many options for cooking outdoors, it may not always be feasible to do so (i.e. a huge snow storm). So make sure you have some back-up plans in place to cook indoors or have some meals that do not require cooking at all.

Thursday, April 24, 2014

Emergency Food Bar

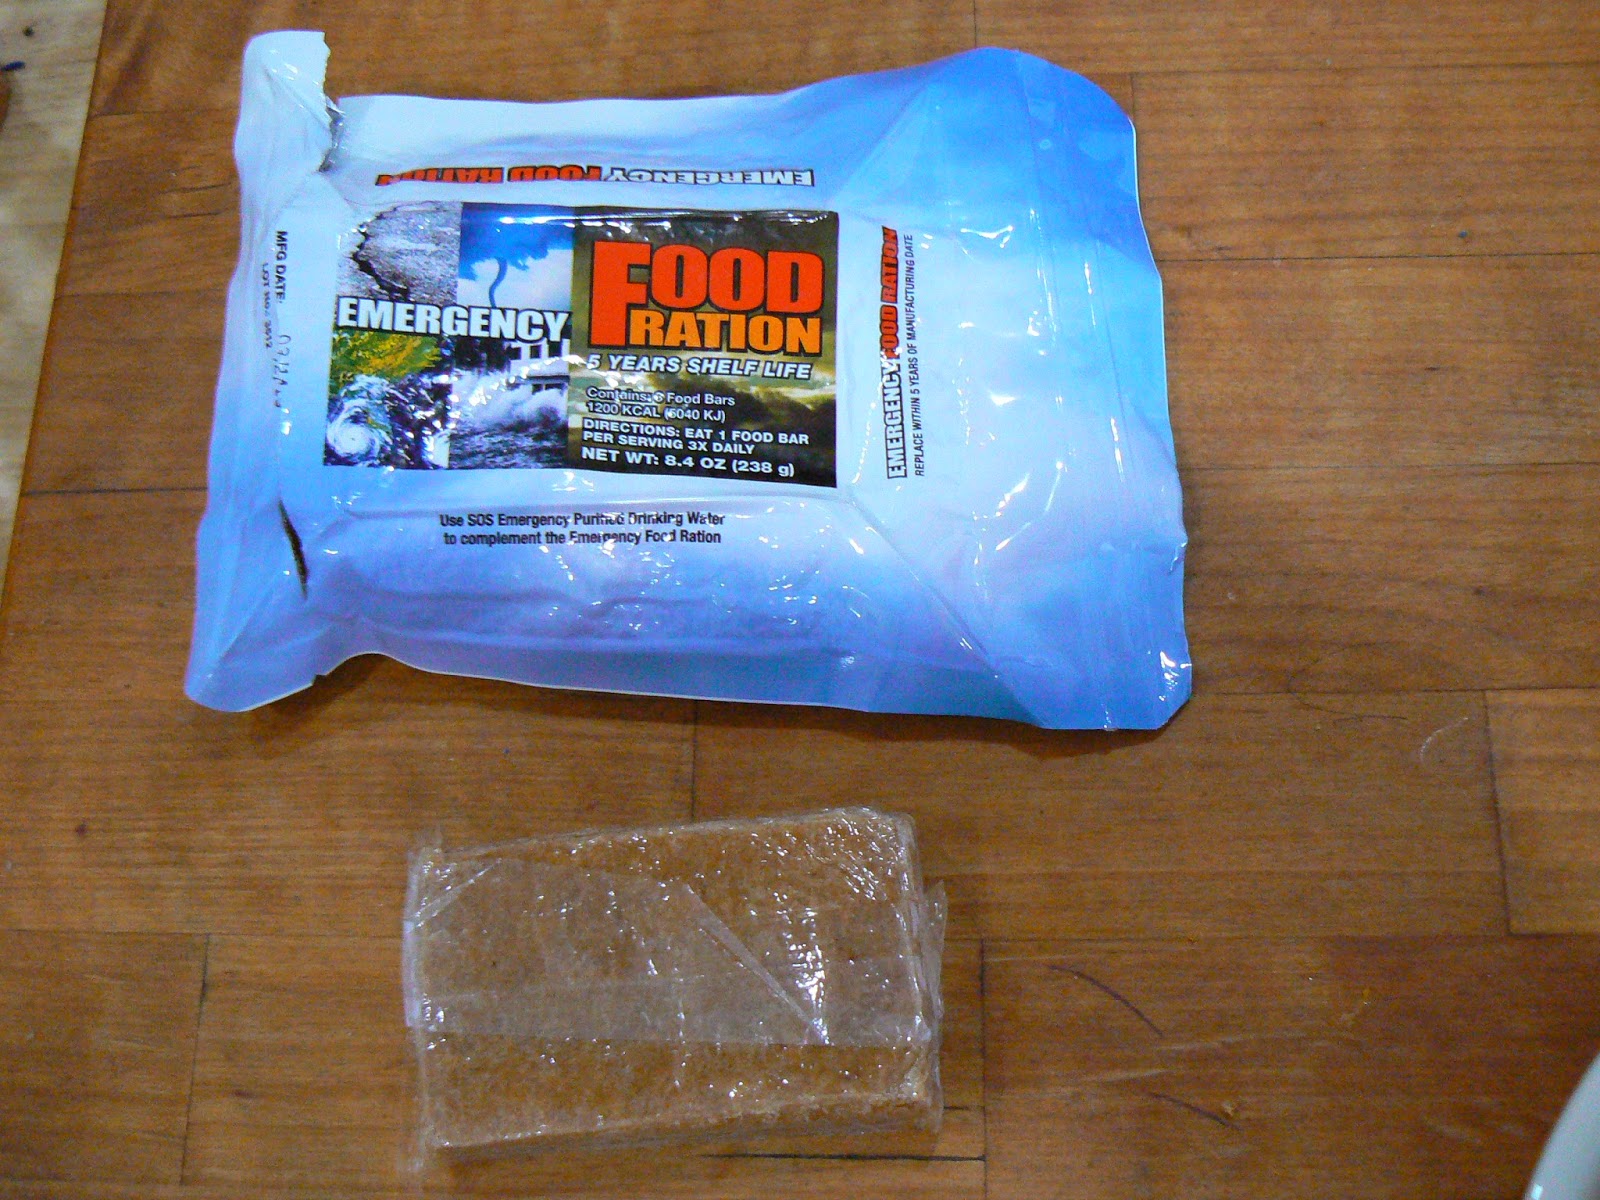
I was looking for lighter and easier food options for my 72 hour kits. I bought a couple emergency food bars to test and see if the family liked them before I bought a lot and filled our kits. I bought the Mainstay Food Bar and the S.O.S Food Bar.

They both came vacuumed sealed in a mylar bag. They both have a 5 year shelf life. And they both have a 'tear here' notch making them simple to open with no tools.


S.O.S Emergency Food Bar 1200 calorie
The SOS bar has 3 individually cellophane wrapped 400 calorie bars. Making it very easy to have a bar a meal. When I first opened it, I was very skeptical about how it would taste, but I was quite surprised. It tastes slightly of coconut and has the texture of a cookie or dry biscuit, without being dry. There is a slight grit to the texture, but it is pleasant. There were a few crumbs, but breaking a bar was simple and nearly crumb free. I had a bar for lunch and found that I was satisfied and didn't need to drink a gallon of water after. In fact, I didn't even have a drink with that "meal".

Mainstay Emergency Bar 2400 calories
The Mainstay bar was not sealed inside the mylar bag, but was portioned out. Breaking a square off was simple and relatively crumb free. The description says a 'pleasant lemon flavor'. It must be very mild, as I didn't notice lemon at all. It was like biting into a sugar cookie. It was very rich and turned slightly creamy as you chewed reminding me of cookie dough. I had intended on having this also for a lunch (on a different day), however after the second bite I started to feel like I had eaten too much raw cookie dough and couldn't finish eating it. I didn't feel hungry or thirsty though. It was too sugary/rich for me.

Then came the real test- The kids


                                                       WE HAVE A WINNER!!!!!

                                  The SOS food bar was the clear winner for the kids.

The Mainstay bar was much thicker than the SOS and the kids couldn't get their small mouths around it. They had to bite the corners and that made for a lot of crumbs.
Both of the bars had great taste, but the S.O.S 3600 calorie is the bar that will be joining our 72 hr kits. I will be putting them inside a ziptop bag to keep them from getting wet or lost once opened.

Tuesday, November 13, 2012

Bugging In

"Bugging out" is the when you must evacuate your home and search for a safer area in the event of a large disaster. Sometimes, bugging out is not necessary or the best decision. The alternative is called “Bugging In.” Bugging In or hunkering down during a large-scale disaster can present many challenges. Most often the utilities we depend on are shut down – known as “Grid-Down.” Disasters can devastate our most critical services including water supply, hospitals, waste and trash removal, transportation options, fuel and grocery supplies, natural gas lines, electricity, phone service, and even public safety. A Grid-Down scenario can last for several days or even weeks. During this time, you must be able to provide basic survival needs for you and your family.

We are counseled by church leaders to obtain our year supply of food. We should be prepared to spend a minimum of 2 weeks during a Bug In. Start with just 3 days and work your way up from there.

Our basic human survival needs remain the exact same no matter where we are in the world or what circumstances we face. They will always be: shelter, water, fire, food, first aid, and self-defense. The order of priority may change, but the basic categories will not. Here is a brief breakdown of each category including several solutions to consider for a short-term Bug In scenario.

Shelter

During a Bug In scenario, shelter may seem fairly obvious. It is your primary place of residence. However, there is more to shelter than just a roof over your head. Shelter must protect us from the elements – even if access to modern utilities is limited or nonexistent. Shelter becomes your #1 priority in cold conditions. You must have alternative heating solutions in place just in case a disaster strikes during cold weather. Some excellent and affordable options are wood burning fireplaces, kerosene heaters, and portable propane heaters.

Kerosene heaters retail for just over $100. They don’t require electricity and are very easy and safe to operate. The fuel (kerosene) also has an extremely long shelf life – I’ve heard of 20-year-old fuel burning just fine.


A small propane heater can last 4-6 hours on one tank. The portable Buddy Propane heater is safe for indoor use. Retail price around $90. For smaller spaces, portable emergency propane heaters are excellent solutions.  Extra propane canisters are easy to store as well.


Wood burning fireplace/stove/insert.Retail $1500+, but can save you money on your electric or gas bill every winter. If you choose to install a stove make sure to get one like mine (pictured) that you can cook/boil water on.


  1. Other home (and car) heating tips: Close off certain rooms of your house and ‘move in’ to the room with the heat source. Close doors or hang blankets to zone out other areas.
  2. Hang blankets in front of large windows to reduce heat loss.
  3. Have good blankets and sleeping bags on hand to help keep you and your family warm.
  4. Just one candle can warm the inside of a freezing car as much as 8 degrees.
 

Water

Whether you use a well or depend on municipal water service, a disaster can put a stop to your flow of fresh drinking water. Without water you can die in as little as 3 days. The best short-term Bug In water solution is to simply store extra water in your place of residence. You can buy commercially bottled water by the case/gallon or you can bottle and store your own water in food-grade containers.
A very popular do-it-yourself water storage solution is re-purposed 2-liter pop bottles.There are countless water storage solutions available ranging from fancy interlocking containers to 55-gallon drums. You’ll have to choose a solution that is right for your environment, budget, and consumption needs. Always store your water in a cool place away from full sun exposure.


Fire

During a Bug In scenario, fire represents two categories: warmth (which we’ve covered) and cooking. I recommend your emergency meals be very simple to prepare, requiring no cooking at all, if possible. However, it’s important that you have an alternative cooking solution in place to cook meals and boil water if necessary.  A few options are:
  1. Fireplace or Wood Burning Stove
  2. BBQ grill
  3. Natural Fuel Rocket Stoves
  4. Camp stove
Stove Tech 2 door stove with Metal liner


Food 

 Think “open and eat meals.” Ideally, your emergency food rations will consist of meals that require 
 little to no preparation. Boiling water for reconstitution should be the most complicated step of any 
 emergency food ration. Your food preps should also have a long shelf life and not require 
 refrigeration. There’s no sense in stocking your shelves with fresh vegetables that are going to rot in a few days or with frozen dinners that will go bad without electricity. It’s very easy to over complicate food storage. Keep it simple!
Freeze dried food- just add hot water
  1. Military Meals Ready to Eat (MREs) 
  2. Freeze Dried/Dehydrated Meals  
  3. Store-Bought Canned Goods/Packaged Foods
  4. Can Your Own Food
  5. Hunting, Farming, Gardening, and Gathering


First Aid

You may not be able to leave your house. Hospitals and pharmacies may not be open. The most important thing in this category is prescription medicines. If you or a loved one is dependent on some kind of medicine then you need to have enough on hand to get you through a short-term Bug In disaster. Explain to your doctor that you are preparing an emergency kit and you would like to have an extra refill for that kit. These medicines need to be monitored and rotated just like food. Ensure that your first aid kit is fully stocked.

Self-Defense

Disasters create abnormal circumstances. First responders (and public safety) are always overwhelmed. Response times are always delayed. 911 is always inundated with calls. Phone and internet services (land and cell) are often interrupted. Disasters can drive good people to do things they would not normally do. 

 Home Security
Simple and inexpensive upgrades to your home’s security can be very effective in preventing successful break-ins during disaster scenarios. A few basic upgrades can include:

  1. Solid metal or wood doors – no decorative glass.
  2. Dead-bolt on every outside door.
  3. Consider an inside mounted door bar for added security.
  4. “Beware of Dog” sign even if you just have a cat or goldfish. Criminals are looking for easy targets.
  5. Upgraded door hardware with deep-set 3” screws.
  6. Exterior motion lights (solar-powered) – front and back.
  7. ‘Defensive’ rose bushes below each ground-level window.
  8. Upgraded window locks / cut wood-block stoppers for inside.
  9. Well-advertised video alarm system – whether you have one or not.

 Self-Defense Tools & Training

Guns are the obvious home defense weapon.This is a personal choice. If you choose to own a weapon ensure that you and your family know how to use it. Firearms training and practice are crucial elements to gun ownership and effective self-defense. Other self-defense tools include pepper spray and stun guns.

Two things many people forget:

1. Know how to turn off your utilities. Disasters have a way of damaging electrical lines/circuits, gas lines, and water lines. If yours are affected you may need to turn them off. Make sure you have the proper tools (and knowledge) to quickly and safely disconnect all of your utilities.
2. Disasters can also affect sewage systems and trash removal. Store extra heavy-duty trash bags to contain human waste and trash just in case. It’s important to maintain a very sanitary bug-in environment. A 5-gallon bucket lined with a trash bag makes a suitable makeshift toilet.


Wednesday, April 11, 2012

Does your home look like a General Store?


 Down through the ages, prophets have called us to action – to prepare ourselves and our families both spiritually and temporally for tests and opposition. While Noah called the world to repent, he and his family followed God’s command to build an Ark. And Joseph with his coat of many colors was first betrayed by his brothers and sold into slavery, then became a ruler of Egypt - eventually ruling over his brothers, and saving their families temporally through his provident leadership. We learn from the Book of Mormon: "But behold, this was an advantage to the Nephites; for it was impossible for the robbers to lay siege sufficiently long to have any effect upon the Nephites, because of their much provisions which they had laid up in store."(3 Nephi chapter 4)

Why a General Store? Just generations ago, a General Store was the source of all the basic goods required to care for and sustain a family. A General Store stocked food, clothing, fabric, gardening tools, seeds, medications, shoes - everything you needed. There was a post office tucked in one corner and often a bank in another.  

You too can create a General Store in your home and become ready for whatever may come. What can you do to get started? 

1. Think of this project as self-reliance, not just emergency preparedness or food storage. It is only through being self-reliant that we are truly prepared to care for our families, and sometimes others as well.  

2. Self-Reliance is more than food storage. Think back to our General Store. It is food, camping supplies in case of a disaster which drives us from our home, car kits in case we become stranded while traveling, 72 hour kits in case we need to flee quickly, stamps, cash, first aid, and medical supplies. If you are currently serving in Scouting, you may want to begin with items you can use while on scout outings, such as a camp stove. Camp stoves are a must have during any power outage, and part of a great General Store. 

3. It doesn't matter where or how you begin, just begin. The Lord will bless your efforts if you will just show your commitment by taking a first step, then a second. Purchase just two or three extra cans of food each week. Ask for camping supplies or a Dutch oven for your birthday or anniversary.  

4. You are the best judge of what to stock. No one knows better than you how your family eats, what your job situation is, or what natural disasters may occur in your area. If your family loves peaches and doesn't like apricots, don't store apricots. I have seen charts that tell you to store 5 gallons of oil per person. I wouldn't use that much oil in ten years, no less one, but you may. Make a list of the foods your family likes and start there to build a three month supply. Don't forget spices and condiments which make an ordinary meal extraordinary. 

5. Once you have decided which foods you want to store, begin stocking your store with a three month supply of those foods. Think about your storage in terms of the food pyramid. Store foods from each food group: fruit and vegetables, meat (proteins), dairy, and grains.  If you don't know how to cook with wheat don't store wheat, at least not until you learn how to use it, but store other grains. The Church has never told us what we need to store, they have only made suggestions based on foods that are inexpensive, nutritious, and have a long shelf life. You must consider for yourself such issues as food allergies, food preferences and your ability to prepare items – thus, which foods to store. A dairy farmer would probably not store much powdered milk. You can have an excellent food store plan without a bean in sight. 

6. Complete a three month supply of the foods you eat before beginning on your long term storage. Having three months of foodstuffs stored allows you time to plant and harvest fruits and veggies to supplement your long term storage. Remember the seeds I mentioned that you could always purchase at a General Store? Three months also allows you time to begin incorporating more of your long term storage items into your everyday diet. 

7. Avoid debt. You should not go into debt for food storage or other items needed for your General Store. There are many ways to reduce spending and shop wisely to get everything you may need. Once self-reliance becomes a priority, the possibilities will begin to be obvious. 

8. It is important to have some cash on hand. During a true emergency, banks may close and credit cards may become useless without the electricity to run card processing equipment. Again, start small and avoid the temptation to spend that pocket change. Every time you skip a meal out and eat at home instead, place the money you would have spent in a special jar and don't touch it! 

9. Educate yourself. There are many great books, forums, websites and blogs which can help. There are experts in your own ward and stake - ask them for help. 

10. Be prayerful. Heavenly Father has always helped those who have made the sacrifice and commitment to live his counsel.  He will help you too.  

11. Never give up. If you get discouraged, ask for help. If money runs low, adjust your purchasing and/or re-examine your spending habits.