"I fear that so many feel that a long-term supply is so far beyond their reach that they make no effort at all. Begin in a small way…gradually build toward a reasonable objective.” -President Gordon B. Hinckley,

Monday, June 29, 2015

Family Disaster Plan


It's a sunny Tuesday afternoon, your children are in school, your spouse is at work, so you take the opportunity to run some errands. You've been to the post office to mail a letter to a dear friend, stopped by the dry cleaner, and have just placed the last item on your grocery list into your shopping cart, when you feel the ground beneath you move. A 7.2 magnitude earthquake has just struck. You somehow manage to make it safely out of the grocery store and realize with terror that your cell phone has no service and the roads are so damaged you can't possibly drive home. 

How will you communicate with your family to find out if they are okay? How will they know that you are okay? And how will you reunite with them? 

It is important to make sure that the entire family is prepared and informed in the event of a disaster or emergency. You may not always be together when these events take place and should have plans for making sure you are able to contact and find one another.

Basic steps to make sure you remain safe:


  • Meet with your family or household members.
  • Discuss how to prepare and respond to emergencies that are most likely to happen where you live, learn, work and play.
  • Identify responsibilities for each member of your household and plan to work together as a team.
  • If a family member is in the military, plan how you would respond if they were deployed.

    Plan what to do in case you are separated during an emergency

  • Choose two places to meet:
  • ̶ Right outside your home in case of a sudden emergency, such as a fire.
    ̶ Outside your neighborhood, in case you cannot return home or are asked to evacuate
  • Choose an out-of-area emergency contact person. It may be easier to text or call long distance if local phone lines are overloaded or out of service. Everyone should have emergency contact information in writing or saved on their cell phones.
  • Go here to download a template for your family plan.

    Plan what to do if you have to evacuate

  • Decide where you would go and what route you would take to get there. You may choose to go to a hotel/motel, stay with friends or relatives in a safe location or go to an evacuation shelter if necessary.
  • Practice evacuating your home twice a year. Drive your planned evacuation route and plot alternate routes on your map in case roads are impassable.
  • Plan ahead for your pets. Keep a phone list of pet-friendly hotels/motels and animal shelters that are along your evacuation routes.

Let Your Family Know You're Safe
If your community has experienced a disaster, register on the American Red Cross Safe and Well website to let your family and friends know you are safe. You may also call 1-800-RED CROSS (1-800-733-2767) and select the prompt for "Disaster" to register yourself and your family.

Tuesday, June 9, 2015

Food Storage- What's for Dinner?


   By now I'm sure you have all heard about what I will call the 'old way' of doing food storage. You may have even found a food calculator that told you how many pounds of each grain, beans, flour, powdered milk, and sugar you needed.  But WHAT are you going to make for dinner with those items?

  I had the same dilemma, I was storing the basics as I was guided to, all the while wondering what on earth I was going to make for dinner if that was all I had. Enter the 'new way' of doing food storage. And by 'new way', I mean the way that I will forever do food storage. There is no right or wrong way, but this 'new way' makes sense and works for my family.


This system is based on a survivable worst case scenario, meaning no running water, no gardens, no grocery store and you could still feed your family. This system will allow you know exactly how much food you will need for a year's supply.

                                                             The System
Write down 7 breakfasts and 7 dinners that you would like to have once a week for a year. There are 52 weeks in a year, so you will be having these meals 52 times. After deciding on meals, write down everything it takes to make the meal and multiply that by 52. Don't forget to add the water you will need for cooking.  My personal food storage has 7 breakfasts( x 52 weeks), 14 dinners(x 26 weeks), a daily loaf of bread (x 365 days), and a variety of desserts. This is a very simple system that saves time and money because you only store what you need and know you will eat. It can easily be adapted for those with food allergies. 

Now you may be saying, "What about lunch?" Well, if I'm in a situation to NEED to be living on my food storage, I'm going to sleep late and go to bed early. We won't need lunch. And meals will take longer to cook without modern conveniences. If you would like lunch, feel free to add that. 

A few examples of meals and the total needed for a year of that meal. 

Let's say you choose spaghetti as a dinner and it takes 1 pound of spaghetti noodles and 1 jar of spaghetti sauce to feed your family. You would need 52 pounds of spaghetti noodles and 52 jars of spaghetti sauce to have that meal once a week for a year. 

Or maybe you chose Taco Soup ( makes 9-10 cups) 
1 pint (home canned) ground beef   x 52 weeks =.........52 pints ground beef
1 can kidney beans x 52 weeks = ................................52 cans kidney beans
1 can corn x 52 weeks =...............................................52 cans corn
1 29 oz can tomatoes  x 52 weeks =.............................52 cans tomatoes
2 cups water  x 52 weeks =...........................................6 1/2 gal. water
3 T taco seasoning  x 52 weeks =.................................2 1/2 pounds of taco seasoning

Everything should be looked at for long shelf life. Many of your favorite recipes can be converted into food storage recipes. Instead of frozen hash browns, try dehydrated potato shreds

Once you have decided on your meals, written down all the ingredients and tallied a total for all ingredients keep that list with you at all times. Put it in digital format if that is more convenient. Then watch for sales and in a timely manner buy your food storage. 

                                                             Rotation

To ensure that the food you store is still safe to eat, you must rotate the store food prior to its expiration date. With this system, rotation is simple. Get a small notebook and as you buy your food storage write down what your bought, when you bought it, the expiration date, and where in the house that food is stored. Each year look at your book and determine what is near expiration.  If something will expire within that year, buy/can a new item, take the old item out of storage and place in your pantry to be used in your weekly meals. Then replace that item with the new. Be sure to record the new expiration date in your book. 


Soon you will have a full year's supply of meals that you KNOW your family will eat. Rotation will be a simple task  that you may even look forward to. 

Additional food storage tips can be found here.

Food Storage Tips

This list is a general overview of things you may find helpful in storing, using, and acquiring your food storage.

FOOD STORAGE TIPS

Baking powder, baking soda, sugar, salt, cocoa: These are some of the items you don’t need to can or vacuum seal. Keep them in their original containers or you can place them in buckets with lids. Baking powder test: 1 tsp in 1/3 c hot water = water fizzes.

Brown sugar: 2 Tb Molasses, 1 cup white sugar. Mix with pastry blender until blended. You can also vacuum seal brown sugar in mason jars to keep it fresh for years. Or store unopened in original bag for 2-3 years.

Butter (almost) 1 pound shortening (butter flavored works) ½ tsp salt, 1 2/3 c condensed milk
Whip the shortening and the salt until light. Add the condensed milk a little at a time and blend.

Butter canned: Check the internet for best prices. 12 oz can, 24 Tb or 3 sticks of butter. Home canned works too.

Cheese canned: Check the internet for best prices. A Velveeta tasting hard cheese that can be shredded or sliced, comes in an 8 oz can. Minimum 5 year shelf life. Freeze dried cheese is great too.

Corn syrup: 1 c sugar + 2 c water. Cook in canning jar in solar oven about an hour or until thick.

“Eggs” from unflavored gelatin (Knox): Buy in bulk at bulkfoods.com. In all the recipes in this book I have substituted unflavored gelatin for the eggs. The gelatin is less expensive than powdered eggs (as little as 3 cents per tsp) and has an indefinite shelf life.
1tsp gelatin =1 egg, 1 oz gelatin = 12 tsp, 1 pound gelatin = 192 eggs.
Making one egg: Combine 1 tsp of unflavored gelatin with 3 Tb of cold water and stir until dissolved. Then add 2 Tb of hot water and stir. When using your own recipes, decrease the liquid called for in your recipe by about ¼ cup to compensate for the added water from the “egg”. I have already done this for the recipes in this book.

Eggs: 1 T dry egg powder + 2 T water= 1 medium egg. Add powder to dry ingredients and water to wet ingredients

Eggs: Storing fresh eggs for up to 1 year. Rub warmed mineral oil on your hands and coat the entire surface of the fresh egg with the oil. Replace egg in carton with the point down. In cold climates they can be stored in a cool, dark place. In warmer climates, place in the refrigerator. Rotate once a year.

Milk: Powdered milk: If you have electricity, powdered milk is best if you use warm water, mix with a blender and chill overnight.

Buttermilk: 1 c water, 1/3 c dry milk, 1 Tb vinegar or lemon juice. Let it sit 5 min.

Condensed milk: ½ c hot water, 1 c sugar, ¼ c dry milk, 1 c water. Place in canning jar with lid and shake until thoroughly blended.

Eagle Brand: 1 c hot water, 1/3 c corn syrup,1 2/3 c sugar, ¼ tsp vanilla, pinch of salt, ½ c butter, 2 c dry milk. Place all ingredients except butter in canning jar with lid and shake until well blended. Gradually add the butter and shake each time until well blended.

Evaporated: 1 c water, 2/3 c dry milk. Whole 1 c water + 1/3 c dry. Skim: 1c water + ¼ c dry milk.

Milk on the shelf: Technology has given us real milk that sits on the shelf and has at least a 1 year shelf life. It comes in quart containers, available in whole, 2%, vanilla soy, almond and rice milk.

Peanut butter: 2 c peanuts and 4 Tb honey OR 2 ½ c peanuts and 2 Tb butter - salt to taste. Blend until smooth. This really needs an electric blender but it can still be done without one.

Rice: If your rice goes rancid, set it out for 2 or 3 days and rinse with water.

Shortening: I have substituted shortening for the oil in all my recipes because of the longer shelf life. Oil has about a 2 year shelf life, unopened shortening has 10+ years. If you can still find the hard lid shortening (not foil lids) they have an indefinite shelf life. Store shortening in a cool, dark place. Opened shortening has a less than one year shelf life. After opening shortening, melt it in the microwave or solar oven, pour it into mason jars and vacuum seal it for a longer shelf life.
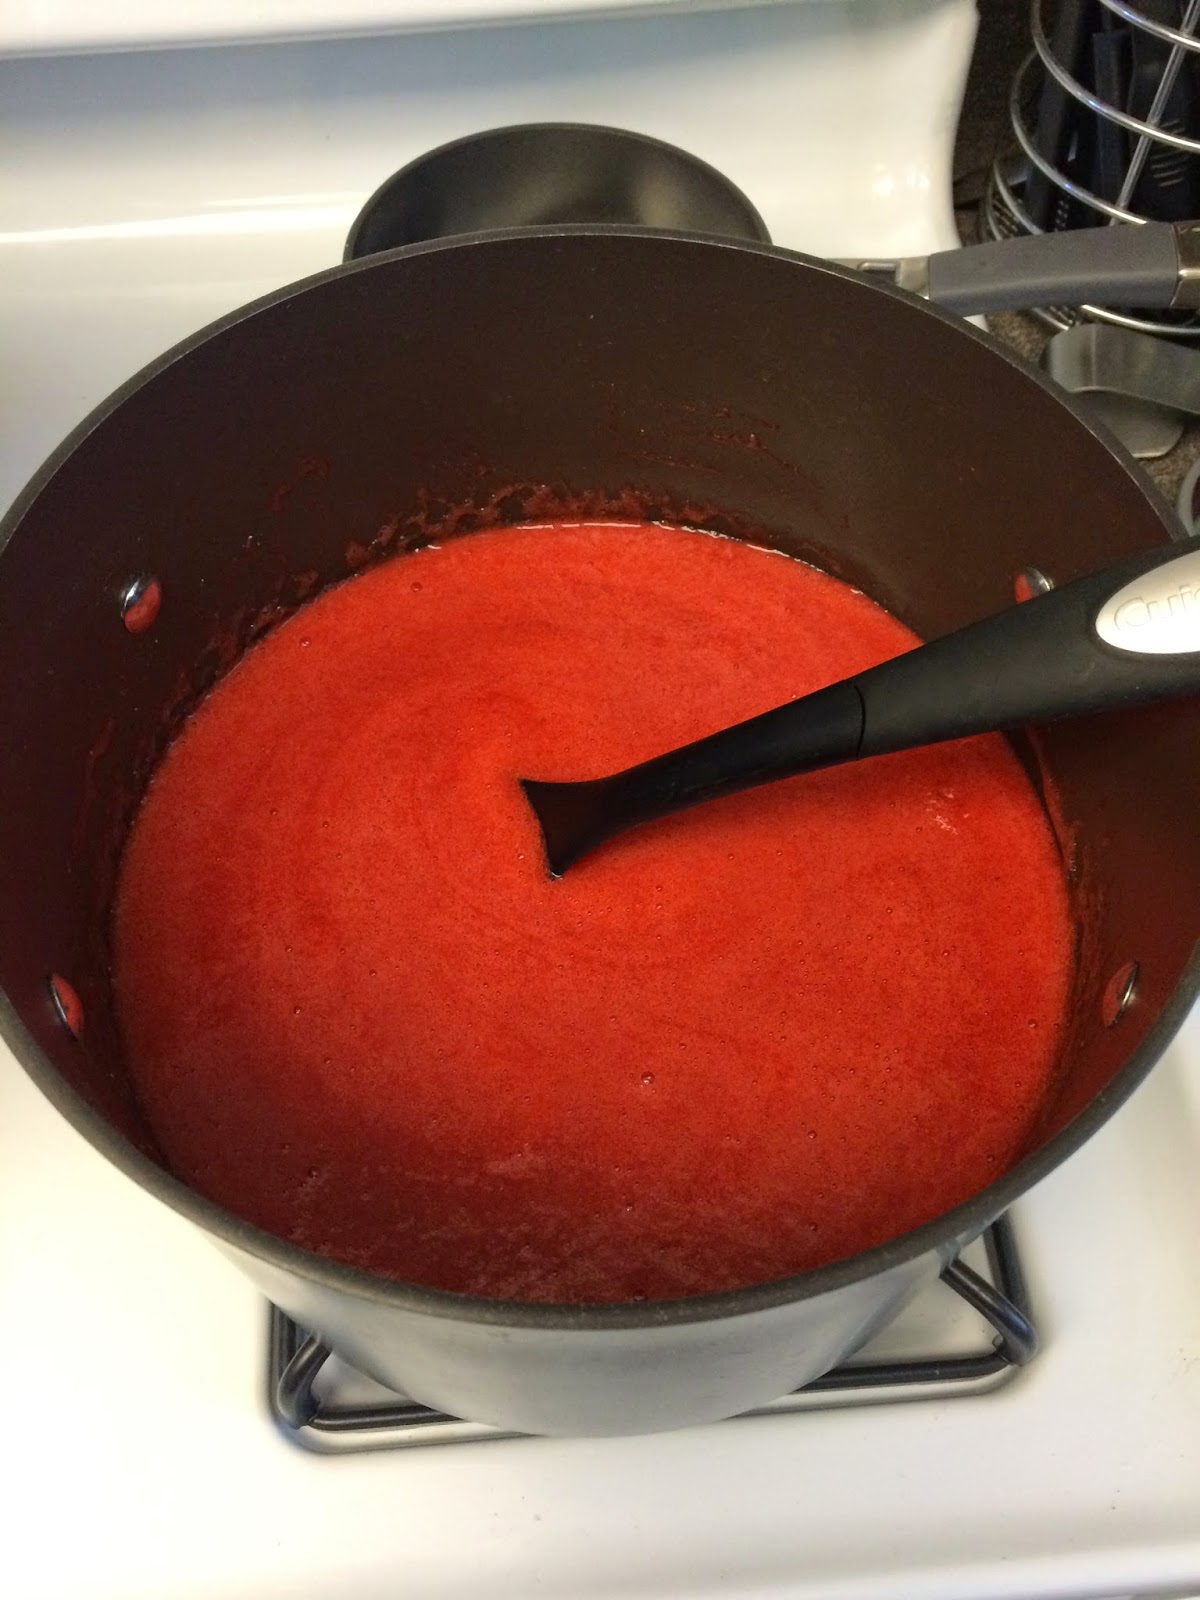
Tomato powder: ½ cup powder mixed with 1 cup water =1 c tomato sauce. Less water makes tomato paste and more water makes tomato juice. Shelf life is 10+ years.

Vacuum sealing foods: Many foods with high oil or high sugar contents cannot be stored in #10 cans because of the interaction with the metal (Chocolate chips, nuts and raisins for example). You can significantly increase the shelf life of your foods by placing them in mason jars and using a Food Saver and a Jar Sealer attachment to vacuum the air out of the jars. Put your ingredients in a mason jar, put a lid on the jar, place the jar sealer attachment over the lid and start the machine. If a jar won’t seal, try placing one lid down and one facing up or heating the lid in boiling water. The jar can be opened and resealed over and over. If you take the lids off carefully, they can be reused indefinitely. You can seal nuts, raisins, chocolate chips, brown rice, cornmeal, candy bars, egg noodles, poppy seeds, dried apricots, malt-o-meal, cookies, granola bars...just about anything in the pantry. Shelf life should be 3 years or more if you keep the foods cool. Remember, the warmer the temperature, the shorter the shelf life.
You cannot vacuum seal foods that need refrigeration…only foods that sit on your pantry shelves.
Don’t vacuum fine powders….they gum up the works of your machine. If you want to seal powders, put a plastic or zip lock bag in your jar, fill the bag, express the air, zip lock it then vacuum seal.
A new Food Saver can be expensive. Used ones are easy to find online and are very inexpensive. Just be sure it has the port hole on top of the machine where the jar sealer attaches. Jar Sealer attachments come in regular and wide mouth.

Water: I store water in the 55 gallon plastic barrels. You can add 1 tsp of household bleach for every 5 gallons of water, but most city water supplies already add sufficient chlorine. 2 - 3 of these barrels per person will fill most water needs for cooking. Store in the garage or on the north side of the house. Do not place directly on concrete.

Yeast: Yeast has an indefinite shelf life in your freezer or one year on the shelf. ALWAYS test your yeast before adding it to your dry ingredients. Add the yeast to warm (not hot) water and wait a few minutes. The mixture will start to bubble and smell good. Add this to your dry ingredients.


Monday, June 1, 2015

First-aid kits


A well-stocked first-aid kit can help you respond effectively to common injuries and emergencies. Keep at least one first-aid kit in your home and one in your car. Store your kits someplace easy to get to and out of the reach of young children. Make sure children old enough to understand the purpose of the kits know where they're stored.
You can buy first-aid kits at many drugstores or assemble your own. You may want to tailor your kit based on your activities and needs. A basic first-aid kit includes:

Basic supplies

  • Adhesive tape
  • Elastic wrap bandages
  • Bandage strips and "butterfly" bandages in assorted sizes
  • Nonstick sterile bandages and roller gauze in assorted sizes
  • Eye shield or pad
  • Triangular bandage
  • Aluminum finger split
  • Instant cold packs
  • Cotton balls and cotton-tipped swabs
  • Disposable nonlatex examination gloves, several pairs
  • Duct tape
  • Petroleum jelly or other lubricant
  • Plastic bags, assorted sizes
  • Safety pins in assorted sizes
  • Scissors and tweezers
  • Soap or hand sanitizer
  • Antibiotic ointment
  • Antiseptic solution and towelettes
  • Eyewash solution
  • Thermometer
  • Turkey baster or other bulb suction device for flushing wounds
  • Breathing barrier
  • Syringe, medicine cup or spoon
  • First-aid manual

Medications

  • Aloe vera gel
  • Calamine lotion
  • Anti-diarrhea medication
  • Laxative
  • Antacids
  • Antihistamine, such as diphenhydramine
  • Pain relievers, such as acetaminophen (Tylenol, others), ibuprofen (Advil, Motrin IB, others) and aspirin (never give aspirin to children)
  • Hydrocortisone cream
  • Cough and cold medications
  • Personal medications that don't need refrigeration
  • Auto-injector of epinephrine, if prescribed by your doctor
  • Essential oils such as these

Emergency items

  • Emergency phone numbers, including contact information for your family doctor and pediatrician, local emergency services, emergency road service providers, and the poison help line, which in the United States is 800-222-1222.
  • Medical consent forms for each family member
  • Medical history forms for each family member
  • Small, waterproof flashlight or headlamp and extra batteries
  • Waterproof matches
  • Small notepad and waterproof writing instrument
  • Emergency space blanket
  • Cell phone with solar charger
  • Sunscreen
  • Insect repellant
  • Whistle

Give your kit a checkup

Check your first-aid kits regularly to be sure the flashlight batteries work and to replace supplies that have expired or been used up.
Consider taking a first-aid course through the American Red Cross. Contact your local chapter for information on classes.
Prepare children for medical emergencies in age-appropriate ways. The American Red Cross offers a number of helpful resources, including classes designed to help children understand and use first-aid techniques.


Thursday, April 30, 2015

Cooking- When the Power Goes Out


Any type of crisis creates a significant amount of stress. If you have spent time developing a variety of alternative energy cooking skills, you will have one less thing to worry about. So the power is out ... sounds like a great excuse to Dutch oven or barbeque. 

Develop a series of cooking options that will ensure you will be able to cook in several emergency situations. Consider evacuation, indoor, outdoor, sheltered, flameless, cold weather, and hot weather as you plan. Carefully plan how you will safely store the fuels that you need. Fuel conservation is a high priority. Storing enough fuel safely to last for a year is absolutely possible, if you practice conservation.  
Be wise (translated that means, "don't do stupid things!"). Please be safe! What an incredible tragedy it would be to survive an initial disaster only to harm your loved ones through a tragic mistake in judgment. Store fuel legally and very carefully. Never burn anything indoors that is intended for outdoor use. Be very careful with any open flame. Err on the side of caution.

Here are a few ways to cook for meals when the power goes out: 
   1. Dutch Oven- One of my favorite ways to cook.Here are a few tips-
*Protect your dutch oven from wind and rain, or add extra coals to compensate.
*Remember, it’s not an exact science, be ready to add or take away coals as needed (usually add).
*Cooking meat? Move coals to the bottom.
*Baking bread or desserts? Move coals to the top
*Meals that require more than 30-45 minutes to cook may need new coals added during cooking. If so, light new coals soon enough to allow them to get going before you need the.
*Keep the lid closed! Avoid peaking more than needed.


2. Camp Stove-  Most people who enjoy camping have some sort of propane or butane camping stove that they use. Don’t be afraid to pull out the stove at home even if you aren't camping. Experiment with cooking some regular family meals on it as opposed to just usual camping food. Pay attention to fuel usage and make a plan for how much to store. You can learn a lot by simply practicing.

3. Rocket Stove-  These types of stoves use minimal fuel and can burn twigs, leaves, pinecones, etc.  HERE is one of the rocket stoves I have. You can also make your own in a pinch from a #10 can.  Instructions for a DIY rocket stove can be found HERE

4. Wonder Oven- Basically, you bring food up to temperature, pop it in a wonder oven, and it continues to cook without any fuel. You still have to have a way to bring food up to temp before putting it in, but these are easy to make at home. Think the off-grid slow cooker. Food cooks all day while you go play!  I love this one and love that they donate one to a family in need in Africa every time you buy one. DIY instructions HERE.

5. Sun Oven- If you can cook with the sun, it is going to be best bet for conserving your fuel. Solar power is renewable and unlimited, as long as it’s a sunny day! Cook any of your regular foods outdoors using the power of the sun. I really like this one, but if you don’t have one there are a couple of plans online to be able to make your own. This one is a little more like a real sun oven, and this one is a simple pizza box oven that will not get too hot but can be used sort of like a slow cooker.

6. Open Fire-  This is the way many a pioneer cooked on their trips west or on the frontier. And if all you have is a cast iron skillet, it will get the job done. 


When it comes to cooking without power, you have to have a fuel source. That fuel source may be in the form of the sun, propane, butane, Insta-fire, charcoal or a variety of other fuels.
I recommend working on building, and using food storage in cases where you have power, then gradually start learning about, and implementing powerless cooking tools.
There are a variety of make-you-own cooking tools out there. They are good for short term emergencies, or to practice and get your feet wet if you have a smaller budget. As you're able to allocate more of your budget to powerless cooking tools, I recommend getting more durable tools.
One thing to consider is that while there are many options for cooking outdoors, it may not always be feasible to do so (i.e. a huge snow storm). So make sure you have some back-up plans in place to cook indoors or have some meals that do not require cooking at all.

Wednesday, April 8, 2015

6 Reasons to add egg shells to your Garden


The shell of a chicken egg is comprised of about 96% calcium carbonate (CaCO3) crystals which are bound together by proteins. Common commercial methods for disposing of eggshells include use as fertilizer or as a source of calcium in animal feed, but the average consumer typically drops them into the kitchen waste bin or down the garbage disposal. If you are among this group, please read on to discover six creative uses for eggshells that will benefit your garden.

1. Fertilizer 

Eggshells are a great way to add calcium to your compost. Because shells have a very high surface area to volume ratio, they decompose very quickly. Don’t even worry about sterilizing or grinding them up. Just toss your shells on the pile or into the barrel and turn them under.

Alternately, you can incorporate crumbled eggshell directly into the bottoms of your planting holes in the spring.

During the winter months, distribute your shells over the garden area where you will plant come springtime. Once the ground warms up, you can till the shells into the soil. If you are adverse to the idea of having eggshells on the ground all winter, you can also clean and store the shells until planting season rolls around.

While calcium is considered a secondary nutrient for plants, your garden will certainly appreciate the added minerals, especially if you grow tomatoes or peppers as these plants are the most easily affected by calcium-deficiency.

2. Pest Deterrent 

If you have problems with slugs and snails in your garden, try sprinkling coarsely-crumbled eggshells around the plants where these slimy little pests like to dine. The shells’ sharp edges deter snails and slugs that attempts to cross the barrier. Most snails and slugs will quickly leave your garden in search of easier pickings.

3. Seed Starter Pots

Because eggshells quickly biodegrade when introduced into soil in the garden, they also double as the perfect seed-starter pots. When you open your eggs to remove the contents, try to break just a small hole at the narrower end of the shell. Clean the inside of the eggshells (boiling water works well for this) and puncture a small drainage hole in the bottom of each empty shell. You can then place them back into the carton, fill each shell with moist potting soil, and add your seeds. Once the seedlings outgrow their “pots” you can transplant them, shell and all directly into bigger pots or out into the garden.


4. Feed the Birds

Both before and after laying eggs, mother birds need more calcium in their diets. Sterilize your eggshells by baking them at 250°F  for about ten minutes so the shells are dry, but not brown on the inside. Then crumble your eggshells well and place them outdoors (in a feeder or even just on the ground) during the spring and summer. You can also mix the eggshell crumbles with birdseed, suet, or mealworms in an existing birdfeeder. Either way, your healthy mama birds just might thank you by also dining on insect pests that may otherwise damage your garden.

5. Repel Deer

If you have deer visiting your garden as if were their own personal buffet every night, scatter some eggshells around the plants they’re munching on the most. Deer hate the smell of albumin and tend to stay away from an area that smells like raw eggs. Just be careful using this method as the smell may actually attract smaller vermin like rodents who like to eat eggs.

6. Aesthetic Value

Finely-ground eggshells can also be quite pretty. If you have a large family or simply eat a lot of eggs, boil your shells to sterilize them, crumble, then drop them into a large glass jar for storage. Once you’ve collected enough shell crumbles, sprinkle them around and in between your plants. Not only will the eggshells help control pests and eventually add calcium back to the soil, the white color can also be a beautiful accent to your garden. Add crumbled oyster shells for an even more interesting appearance with all of the same garden health benefits.


With these six tips under your belt, now both you and your garden can enjoy the health benefits of nature’s perfect food – the egg.


Wednesday, March 25, 2015

Strawberry Jam


There's nothing tastier than a slice of toast with homemade strawberry jam, packed with fresh fruit. Store-bought versions are full of high fructose corn syrup, artificial flavorings, and sometime who knows what. Instead, follow my easy guide to make a delicious homemade version.

Step one: Prepare your strawberries. I give them a super quick rinse, so they don't absorb too much water then wipe them off with a towel. (too much water and the jam won't set properly) I have this amazing tool called a strawberry huller and it makes short work of removing the stems.

Step two: In large stock pot add 8 cups of crushed strawberries. ( I prefer smooth jam, so I dropped the strawberries into my vitamix machine for 30 seconds) Add 6 tablespoons of Ball Classic Pectin, 7 cups of sugar, and 1/4 cup of lemon juice. Stir until all the sugar is dissolved. Bring to a rolling boil.
TIP:add 1 tablespoon of butter to reduce the foam.


Step three: Bring to a hard boil for 1 minute, stirring constantly. Remove from heat. To test the set, spoon a small amount of jam onto a plate and place in the freezer for 30 seconds. Remove from freezer, then push with your finger; if the jam wrinkles and doesn't flood to fill the gap, it is ready. If not, turn the heat back on and boil for 2 minutes longer, then turn off the heat and do the wrinkle test again. Repeat until ready.


Step four: Skim any foam if necessary. Ladle hot jam into hot jars leaving 1/4 -inch headspace. Adjust the two piece caps.  


Step five: Process 10 minutes in a boiling water canner. Then remove jars to cool and seal on your counter top. The jam can be stored for up to 1 year in a cool, dry place. Refrigerate after opening. 


Strawberry Jam
Yield:about 8 half pints
8 cups strawberries                             1/4 cup lemon juice
6 tablespoons Ball Classic Pectin        7 cups sugar

Wash strawberries:drain. Remove stems. Crush strawberries one layer at a time. Combine strawberries, pectin, and lemon juice in a large saucepot. Brig to a boil; stirring occasionally. Add sugar, stirring until dissolved. Return to a boil. Bring to hard  1 minute boil, stirring constantly. Remove from heat. Skim foam if necessary. Ladle hot jam into hot jars, leaving 1/4- inch headspace. Adjust two piece caps. Process 10 minutes in a boiling- water canner.